Continue Reading...
With Easter just around the corner, hair salons are beginning to collapse. With how difficult it is to find a day off that fits in our schedules to go and get a change of look, a new haircut or a manicure that can withstand all the hustle and bustle of vacation days.
If you want to save yourself the wait, at least as far as manicure is concerned, in we tell you the best kept secrets of Beter, with one of its star products, the Gellack Basic Starter Kit for permanent manicure , with which you will get enviable nails in three easy steps.
WARNING: From here on, only those people who are not allergic to acrylates and who want to achieve heart attack nailscan continue readingthanks to Gellack's Basic Starter Kit for permanent manicure.
If you keep reading the entry we will tell you how the Gellack Permanent Manicure Basic Starter Kit is applied step by step , you will see how easy it is to do it and the result will surprise you.
In addition, we will leave you a practical video-tutorial so you can see how easy it is to do it and how little time it takes compared to what it would take in a beauty salon.
The first thing you have to have to get a Gellack permanent manicure is, obviously, have in your possession the Gellack Basic Starter Kit for Permanent Manicure. If you click here , you can find it in our online store, where you can also comment and give your opinion once you try it, even if you have any questions, you can send it to us through the customer service phone.
If it is the first time that you are going to perform a permanent manicure with Gellack, it is recommended to start with the starter kit , but if you already have it, you can get the loose products to replace the items that you run out. Simple as that.
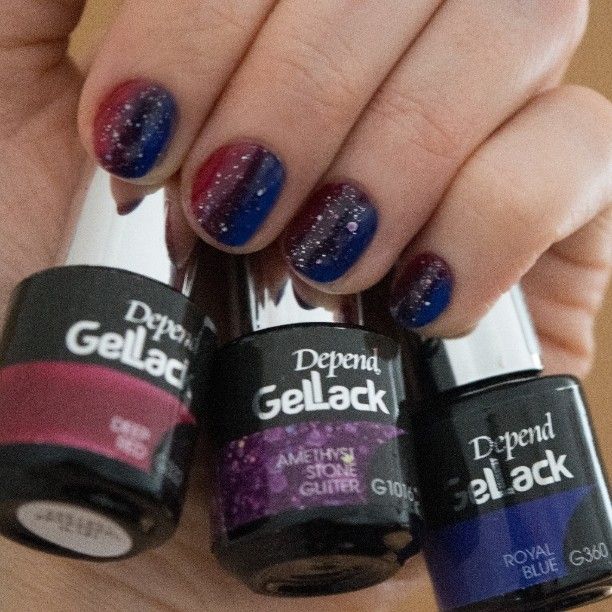
When you have the Gellack Kit in your hands you will see that it is very complete. It has three numbered bottles, to make the manicure process easier. The first is the Depend Cleanser for before and after 35ml. You will find the 5ml Gellack Base and the 5ml Top Gellack, these are the main actors of the work, since they will make your manicure last up to 3 weeks, without losing shine or quality.
In addition, the Kit contains a nail file and an orange stick to give that personal finish that you like the most.
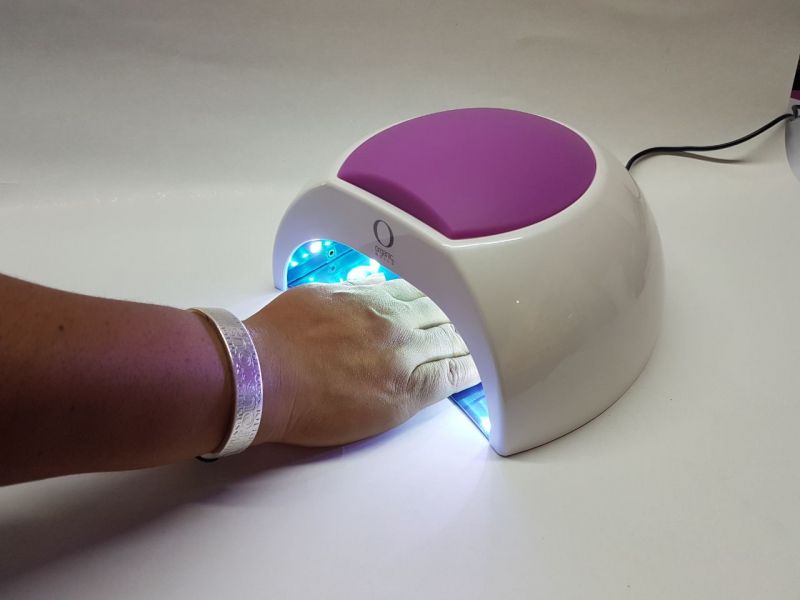
As you already know, this new way of doing a manicure has a fundamental basis, it is the LED lamp with adapter. LED lights are much faster than UV lights, which is why they are more expensive. The lamp has three rows of lights and a molded finger rest so that when you dry your nails, it is comfortable and easy to use.
In addition, l to LED lamp has a timer to control the drying time so that you have everything controlled and do not damage your nails during the process.
We all know that the manicure process is a ritual that not everyone likes. But when you see how your nails are after the work done, the first thing you think about is going out and showing them off. Therefore, do not skip any of the points below if you want to have perfect nails for any occasion.
Step 0
Step 0 is the most important of all and is that, before starting, we have to prepare the nails with a new cleaning and application technique. It is essential to clean the nail surface well. To do this, we must generously moisten a cotton wipe with Depend Before and After Cleanser and press on the nail, leaving it to act for 5 seconds. Next, we remove it by passing it along the entire length of the nail, without rubbing horizontally.
Every time we harden the nails under the Led lamp, we must perform this action on all the nails each time. It is recommended to change the cotton pad every four fingers.
Step 1
So that you do not get confused when following the process, Beter has numbered each little bottle so that you follow the order and we do not make mistakes or skip any step. We start with the Before & After bottle of cleanser, which is the first and fifth step of this manicure. In the first step we will use it to remove any polish that we have on the nail in order to correctly apply the new products.
Step 2
In this step we have to take the bottle of Depend Gellack with the Base, trying not to touch the cuticle or the skin. It is very important that you clean the skin if the Gellack liquid comes into contact with the skin, so that it does not harden. You can use a cotton swab and a little Depend Before an After Cleaner.
It is very important to choose a polish that is compatible with this type of manicure, so it is recommended to use polish from the same brand. You can check Gellack nail polishes with a single click.
Step 3
It is time to apply the color of our nail polish. As we have already told you, the color included in the kit does not come, but they have irresistible prices and have such adorable tones that you will not know which one to choose.
It is advisable to use two layers of color, each layer with its estimated time in the LED lamp. With the first layer of polish on, we leave the nails under the lamp for 30 seconds.
Step 4
The fourth step is the Top Coat step, it is the final coat and it is the step that gives your manicure that spectacular shine. We try not to touch the cuticle or the skin around the nail and let them dry under the LED lamp for 25-30 seconds.
Step 5
At the end of the process, the surface of your nails will be a bit sticky, do not worry, with a cotton pad generously impregnated in Depend Before and After cleaner. Remember not to rub horizontally.
If even so it has not been very clear to you how to do the manicure with the Gellack Basic Starter Kit, we leave you an explanatory video by Rocio Soriano , a video blogger that explains the manicure process step by step, in a visual and fun way . You will see that it is very simple and that, with a little skill, you can get incredible nails.
!Until next time!
If you want to be aware of all the news that arise in the world of cosmetics and beauty, do not stop following us on social networks!